Sunday, March 18, 2012

Valentine's Day Sweets For My Loves

I love to make my loves something
special and homemade each holiday. 
For Valentine's Day, I baked up some
 yummy treats filled with love!

Mini-Cupcakes, Heart Shaped Cookies,
Chocolate Heart Lollipops, 
Chocolate Hearts and Stars and
Chocolate Covered Strawberries!


For my 5 Loves!


While I was making the cookies,
I had some extra help.
My little helper really
enjoyed helping his
mommy!


I love this picture of him
trying to roll his cookie!

We need some more colorful Jimmies!

He was so proud of his very own cookie!

This was the best Valentine's Day!!
I love my family!!


What else did I make today besides candy??

I've been a busy mommy making candy for my loves today.
As you read in the last two posts, 
I made Shamrock Chocolate and Lollipops.
I also made my favorite St. Patrick's Day 
Philadelphia Tradition, Irish Potato Candy!!! 
I even broke down and shared my recipe! 
See the luck of the Irish really was with you today!!!


So.....what else did I get accomplished today?

Well, let's see? First, I received a fabulous
diaper cover pattern from Le Hair Couture.
You can find her at

I was so excited about this pattern that once
I received it, I just had to get started
making my own diaper cover! I've made 
diaper covers before using my own pattern
but I wasn't 100% happy with them so
I decided to look for another pattern.
 I'm so glad I did because I love this new pattern
and I hope you will too! 

This worked up so nicely and didn't take
much time at all. I made both the beanie
and the diaper cover in less than 2 hours!

So without further ado...here's
Little Miss Ladybug Set

The Back

Just because of these two
adorable little buttons,
this set was created !

I also had a chance to make a few  
 things for the kitchen collections.
These are for the 
Americana/Primitive Collection!

I am using a set of these as wall decor
in my kitchen! It looks great on the wall!

You can also use these as coasters,
planter coasters, make-up cloths
or hot-pads.
You decide as there are many 
ways these can be used!
All made with 100% cotton
and machine washable!

This one is my favorite! 


I also started on a few other projects
that I need to get done before May!


This will be for a child size afghan.


This will be for a baby afghan. 


That's all that I got made today!
Not too bad! 
I also was able to get in some
family time and celebrate
St. Patty's Day together!

Here we are all decked out in
our St. Patty's Gear!

My Hubby

Wearing his St. Patty's Day
Cat-in-The-Hat type hat,
assorted beads and 
St. Patty's Day T-Shirt.
Awww, both of our boys
fit into this hat when they 
were newborn babies!


Yours Truly

wearing one of my handmade crocheted
St. Patty's Day Beanie, Shamrock Scarf, 
Assorted Green Beads (not showing)
and my Celtic Shamrock Tattoo!


Our Oldest Daughter

Wait a minute!! Where is she?
She refused to allow us to
take her picture today! 
12 Year Olds! LOL

Our 10 Year Old Daughter
Who was Due today for 
St. Patrick's Day but was stubborn
 and waited 6 more days to be born!!

She's wearing her favorite 
St. Patrick's Day T-Shirt
"Shamrock & Roll"!
She's also wearing the crocheted beanie 
that I made for her along with her
assorted beads and the handmade
Shamrock Chocolate Lollipop that I made today!


The Boys
Our 3 Year Old
and
8 Year Old 
Sons

They are both wearing the
 handmade crocheted beanies
that I made along with
their beads and Lucky
T-Shirts. Let's not forget their
favorite Shamrock Chocolate
Lollipops that I made today!

Our 3 Year Old
He was helping me make
the Irish Potato Candy!

We had a FABULOUS Day
and hope you did also!

Until next time!


Saturday, March 17, 2012

St. Patrick's Day- Homemade Shamrock Chocolates

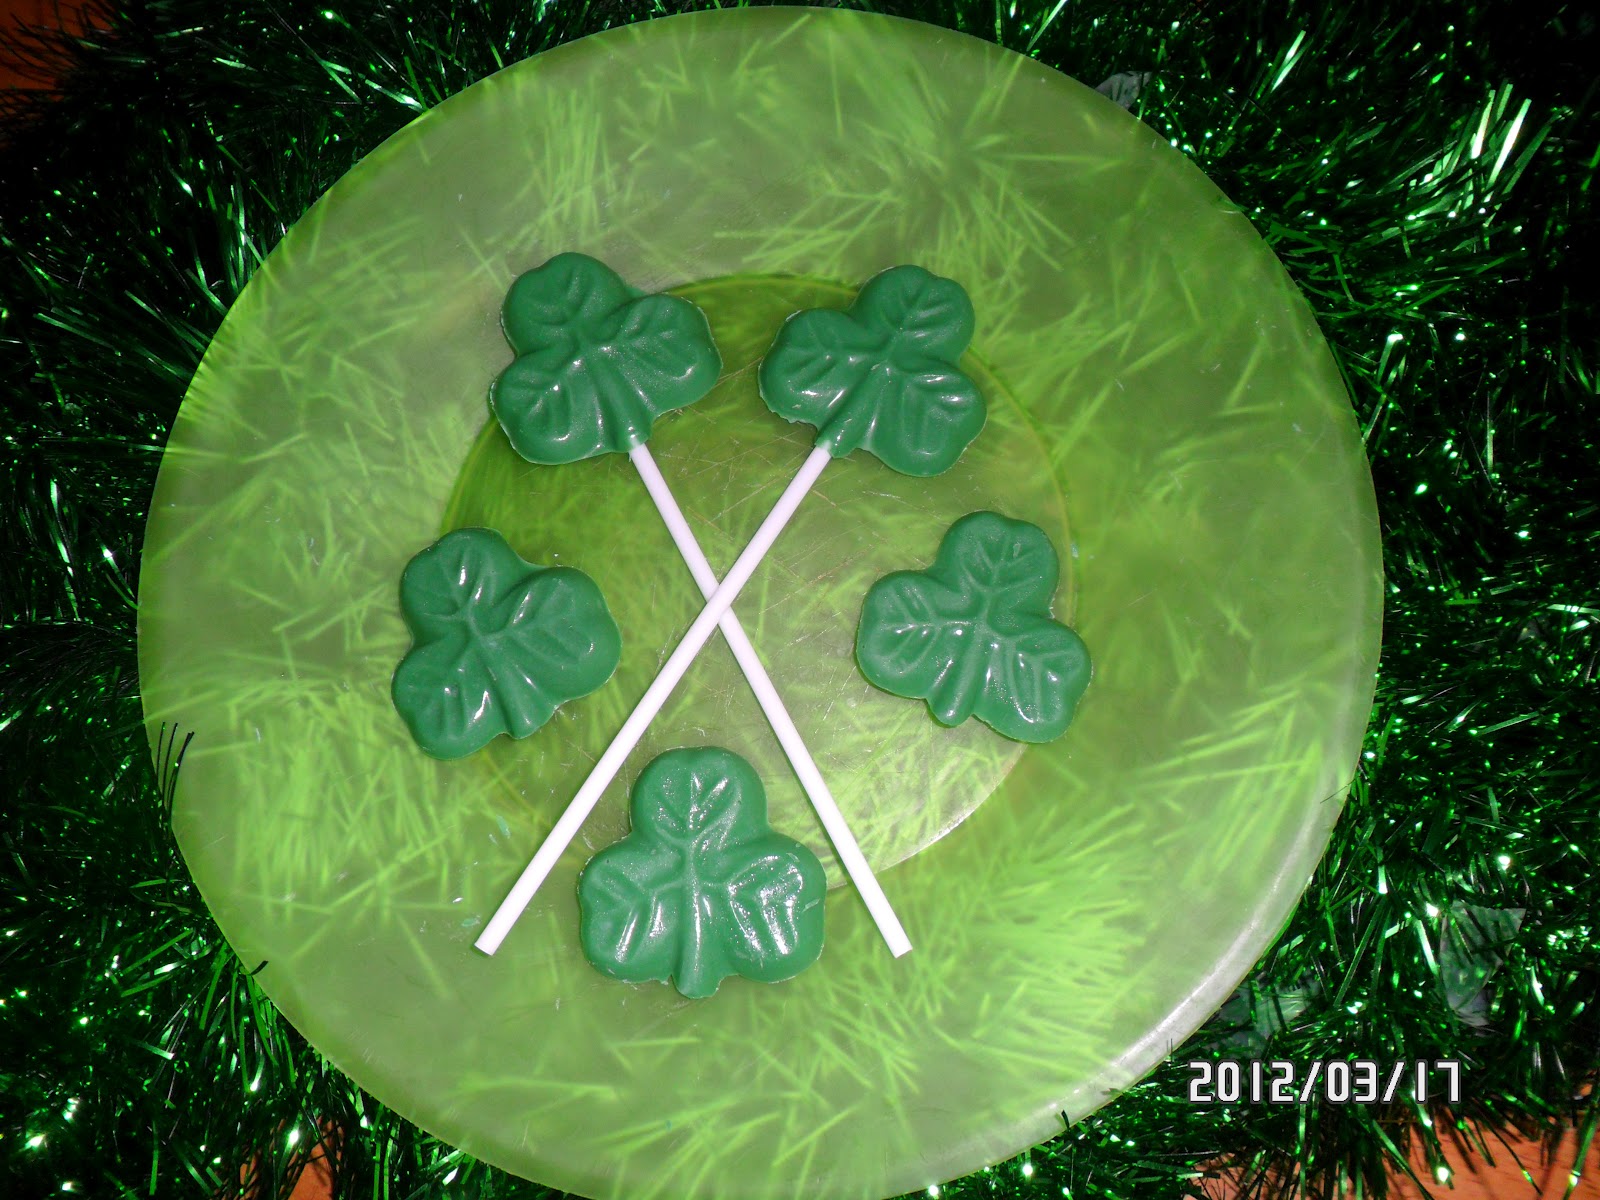
Shamrock Chocolate Lollipops and Candy 


I've been busy today making my loves homemade St. Patrick's Day
 Chocolates and Irish Potato Candy.
 My previous post has the Irish Potatoes in it, so be 
sure to read "St.Patrick's Day Homemade Goodies".
 As promised, here is how I made the candy today.


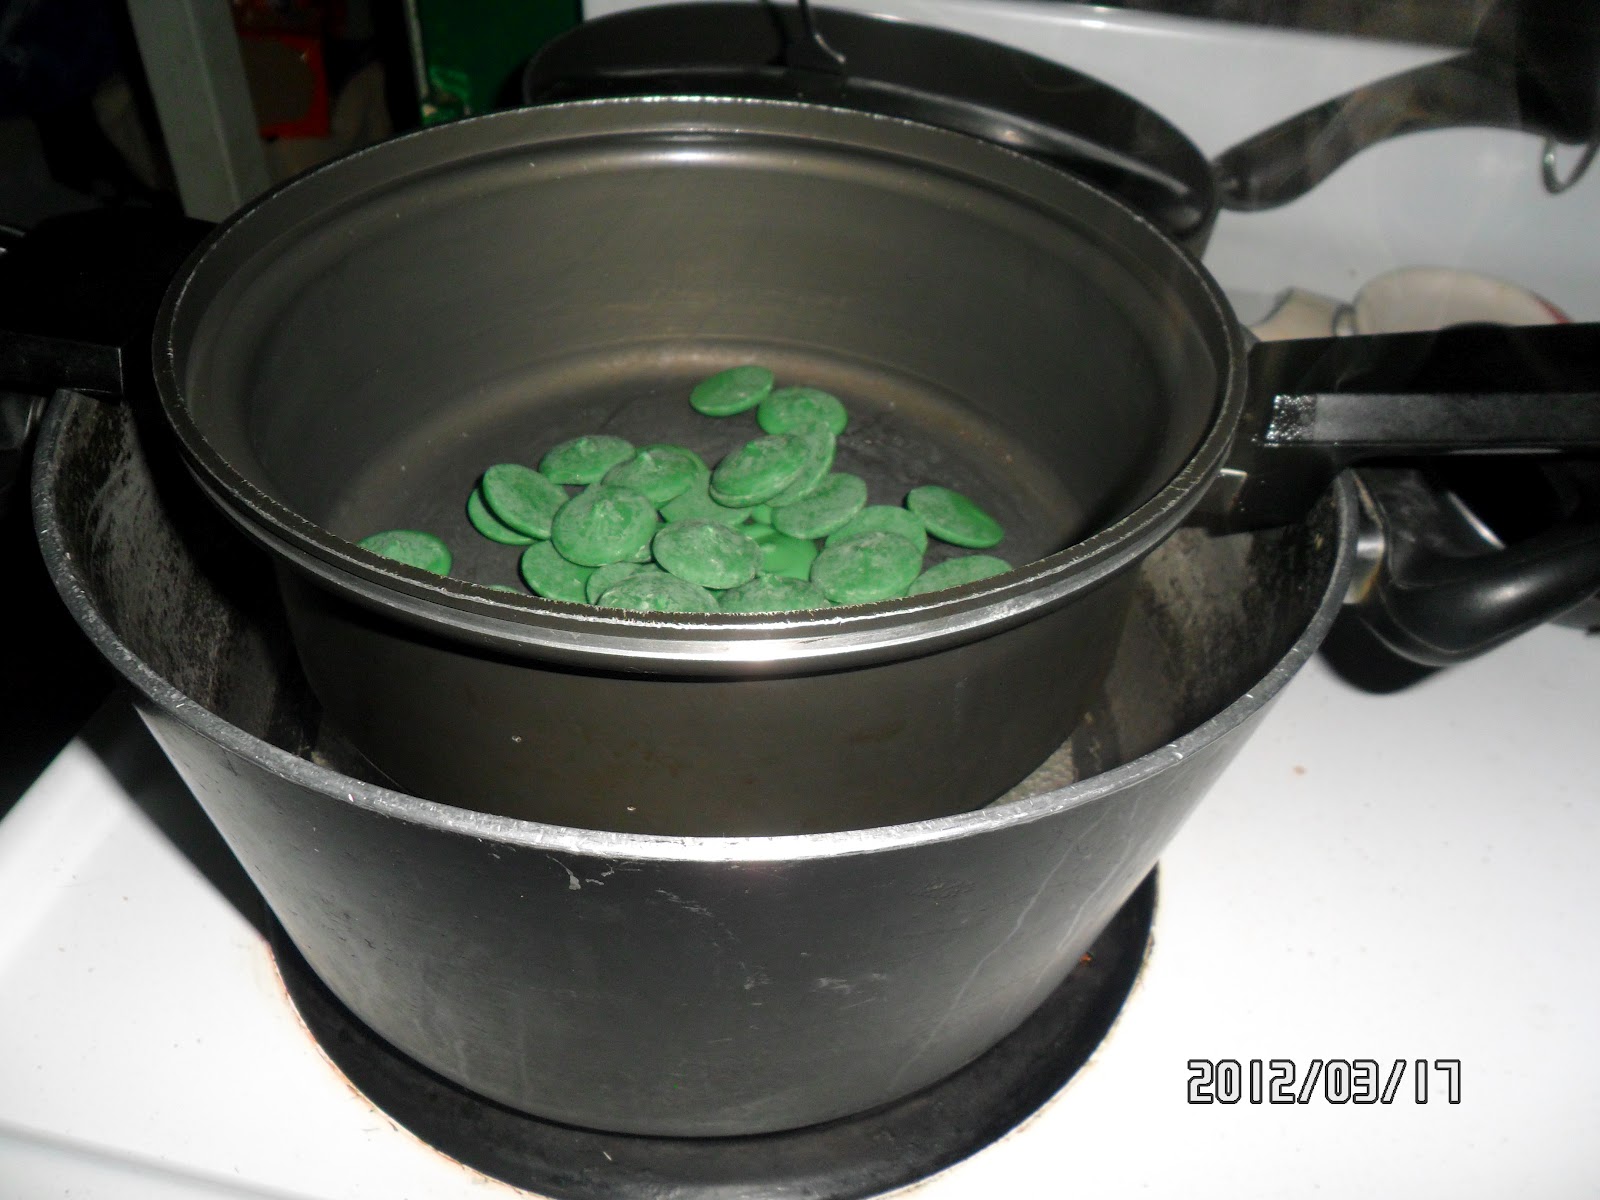
I used the Wilton Brand Candy Melt in Green.
I normally would have made the normal size bag
but since I made other goodies, I just made a small batch.


Next, you need to decide how you are
 going to melt your candy melts.
Are you going to use the microwave or 
use the double broiler style?
I  prefer to use the double broiler style. 
I find that the microwave 
doesn't melt them evenly.

To use the double broiler method,
 use a large pot and fill with water 
until its just under half full.
 Place a saucepan on top of the large pot.
 It's important for the saucepan to sit 
on the larger pot without touching the water.
 If the bottom of the saucepan touches the water,
 remove enough water so that it doesn't
 touch the saucepan at all.

Turn on the stove to a low to medium heat. 
Place the candy melts into the saucepan. 
*We are not boiling the water or cooking the candy melts,
 we just want to use enough heat
so they melt evenly without scorching.

Add Candy Melts to saucepan


This is how the double broiler method will look like.


Stir the candy melts with a wooden spoon.


Stir until completely melted and smooth.


Make sure you have a clean and roomy work space.
Have your candy template and tools in place in your space.
When the candy melts are ready, bring over the
saucepan and place on a hot-pad on the counter.
*I make my own hot-pads and pot-holders pictured here!


Using a spoon, gently scoop up some candy mixture
and place into the cavity of the template. Don't put alot of
candy melt on your spoon as it is hot and will slide right
off the spoon quickly and most likely overfill the cavity.
 *I use a grapefruit spoon. I find that it's smaller
 and more narrow than a normal size 
teaspoon and works perfectly. 


Using the spoon, gently push the candy melt 
around the cavity of the template evenly.


If you are making lollipops, add your stick now.
*I also use the same template for making the 
shamrock candy. Just stop filling when you get to the 
cutout for the lollipop stick.


Add a little more candy melt over the stick.

When finished filling up the template, put onto a cookie tray,
cover with wax paper and chill in the fridge. 
You can also chill them in the freezer 
for about 10-15 minutes or until set.

Remove candy from templates by gently tapping on 
the plastic on the opposite side. If you are having trouble
 removing the candy, put back in the fridge or freezer
 as they are not ready yet if they don't easily pop out.

When they are done..

Enjoy!!!!!


I always have volunteers to taste test the candy!
Today's candy testers are my 3 and 8 year old sons.
They are both wearing the handmade crocheted 
St.Patrick's Day Beanies that I made for them. 

By the way, they both Approve of the candy!

Happy St. Patrick's Day!

Homemade St. Patrick's Day Goodies!

For those who know me, you know that I can't have a Holiday without making some of my homemade goodies. Since today is St. Patrick's Day, (and what should have been our daughters 11th birthday except she was stubborn and waited 6 more days to make her grand entrance into the world) I've decided to make some Shamrock shaped chocolates and lollipops.

Now being born and raised in the City of Brotherly Love.....Philadelphia, Pa, I couldn't pass up the chance to make some Irish Potatoes! Irish Potatoes have been a tradition in Philadelphia for more than 100 years. Who doesn't love these amazing treats? If you aren't from the Philadelphia area, chances are that many people never heard of this. An Irish Potato isn't a real potato but a wonderful creamy candy that is made on St. Patrick's Day every year. I've had so many compliments over the years when I make these and the same question is always asked....How do you make them?

Here's my St. Patrick's Day treat for you all....

The recipe!

First you will need to purchase these items:

1/4 Cup Butter - softened
1/2 Cup Cream Cheese (8oz package) - softened
*I use Philadelphia Cream Cheese for this Philadelphia Treat!
1 Teaspoon Vanilla Extract
4 Cups Confectioners Sugar
2 1/2 Cups Flaked Coconut
1 Tablespoon Ground Cinnamon
*I use Cinnamon Sugar instead because the kids like it better than the ground cinnamon.

Let's Get Started!

In a medium bowl, add 1/2 cup
 (The entire 8 oz package) of cream cheese.

 Add 1/4 cup butter; Beat the butter and cream cheese together until smooth. 


Add 1 teaspoon Vanilla Extract


Add 4 cups of confectioners sugar.

This next step is very important if you 
want that extra special sweetness!


Add the most adorable and sweetest little assistant to help!
Continue to add confectioners sugar, little by little. 


Continue mixing together until smooth. 


Another important moment
Your assistant will want a little taste test.

What's the verdict on that taste taste?

The results are in......

This cute little guy wearing confectioners sugar
all over his face.....

Says he APRROVES! 
So we may continue!
Looks like the mixture is smooth enough!

Now add 2 1/2 cups of Flaked Coconut.

Mix together with a wooden spoon 
or your hands. 

The mixture looks good! It will be quite sticky,
so cover the bowl and chill in the fridge until chilled.

Once its chilled, remove from fridge
.
Time to make the potato balls.

Take some of the mixture into your hands and make small potato
 or ball shapes by rolling the mixture between the palms of both hands.
 Make them to the size of your liking.

Next, place the potato ball into the ground cinnamon mixture.
Roll gently until covered with cinnamon.

Above is the traditional Irish Potato covered
with ground cinnamon.

Below is a picture of the Irish Potato covered
with cinnamon sugar the way my kiddies like them!


Place the cinnamon covered potato on cookie sheet with wax paper.
Chill in the refrigerator until you're ready to eat them.

Or if you're impatient, just go ahead and eat one right now!


 Yummy!!


And here's what they look like when they are finished!

Ground Cinnamon on left
Cinnamon Sugar on right


Enjoy your Irish Potato Candy! 

Stay tuned for the next post
about my Shamrock Chocolate Candy!

Happy St. Patrick's Day!